Showing posts with label DIY. Show all posts

Monday, August 12, 2013

A Nautical Nursery

After moving to Texas, I decided to do the babe's room to remind him {or rather me} of Florida by creating a nautical feel. What better colors to use than red, blue, and white. I also incorporated some gray and distressed wood. What I like best about his new nursery is that it will be so easy to convert into a little boy's room.

I like to keep things inexpensive and re-use whatever I can. Here's a perfect example:


The framed pieces were actually the inside of a Vera Bradley bag. I just cut them out and framed them in my Ikea frames, which were used in our Florida nursery. The 'C' was also used in his old nursery. I painted a white canvas, purchased at Hobby Lobby, with some red paint and hot-glued the 'C', and voila...art! This three piece set is hung above the dresser / changing table. From previous experience, I have learned to hang the pieces high enough where the bo can't grab.

Another example is the buoy, which I found years ago in my dad's warehouse. I nailed the buoy to a burlap covered canvas and hung it on the wall. I bought the distressed wood frame and the American flag at Hobby Lobby. You know everything there is super inexpensive; I think the frame was $7 and the flag {actually a set of 4} was a buck. The old glass bottle was another find from my dad's warehouse, and the shelf was a purchase I made years ago during college. I hung all of this above the short bookshelf.


I really didn't  want to paint all the walls, so I brought in color by framing dark pieces of art behind the crib. The 4 coastal animal prints are actually vintage-looking cliparts that I adjusted using photoshop. I simply added either a navy or red background and had the color bleed into the outline. I printed the 5x7 pieces at Walgreens for about $10. The coral and sailboat prints are actually Waverly fabrics I purchased from JoAnn's. I bought half a yard of each, which cost a total of $10. Again, I already had the frames, which came from Ikea, Michael's and Pottery Barn Kids. 


Here's another view of the art behind the crib:


My mama, as sweet as she is, sewed a navy bedskirt using 2 old bed sheets. It took less than 3 yards to make the entire skirt, which includes a pleat in the front and the back. I love the navy against the white crib and white bedding. Looks very classic and very nautical.


I contemplated {for a LONG time} on whether I should paint stripes on the white curtains, or leave them as is. I knew I had to hem them {we went from 12 ft ceilings to 8 ft}, and I didn't really want to spend a lot of time on this project. Since I wasn't confident that I would always love the stripes, I decided to just paint the wall on which the curtains would hang. That way the curtains would stand out and I could easily re-paint the wall if I wanted to. I picked Martha Stewart Wrought Iron. It's the PERFECT navy color. I'm basically obsessed with it. I seriously want to paint other things this most perfect navy color! I used an eggshell, paint + primer in one, which I totally recommend, especially for darker colors. A paint + primer in one saves tons of time and goes on much thicker, making it better to use for dark paint colors.


I also sewed an easy lumbar pillowcase using some of the Waverly sailboat fabric I purchased from JoAnn's, just to tie everything together. I used a serger and it took about ten minutes top to create the pillowcase.


And now I have a happy baby boy who loves his new room!


If you have any questions or want to see more photos, just ask!

xo

UPDATE:

Here are a few more pics. Enjoy!


PS - the rustic anchor {aka towel holder} is also from Hobby Lobby. It was under $5.


Tuesday, April 23, 2013

Needing Some Input...

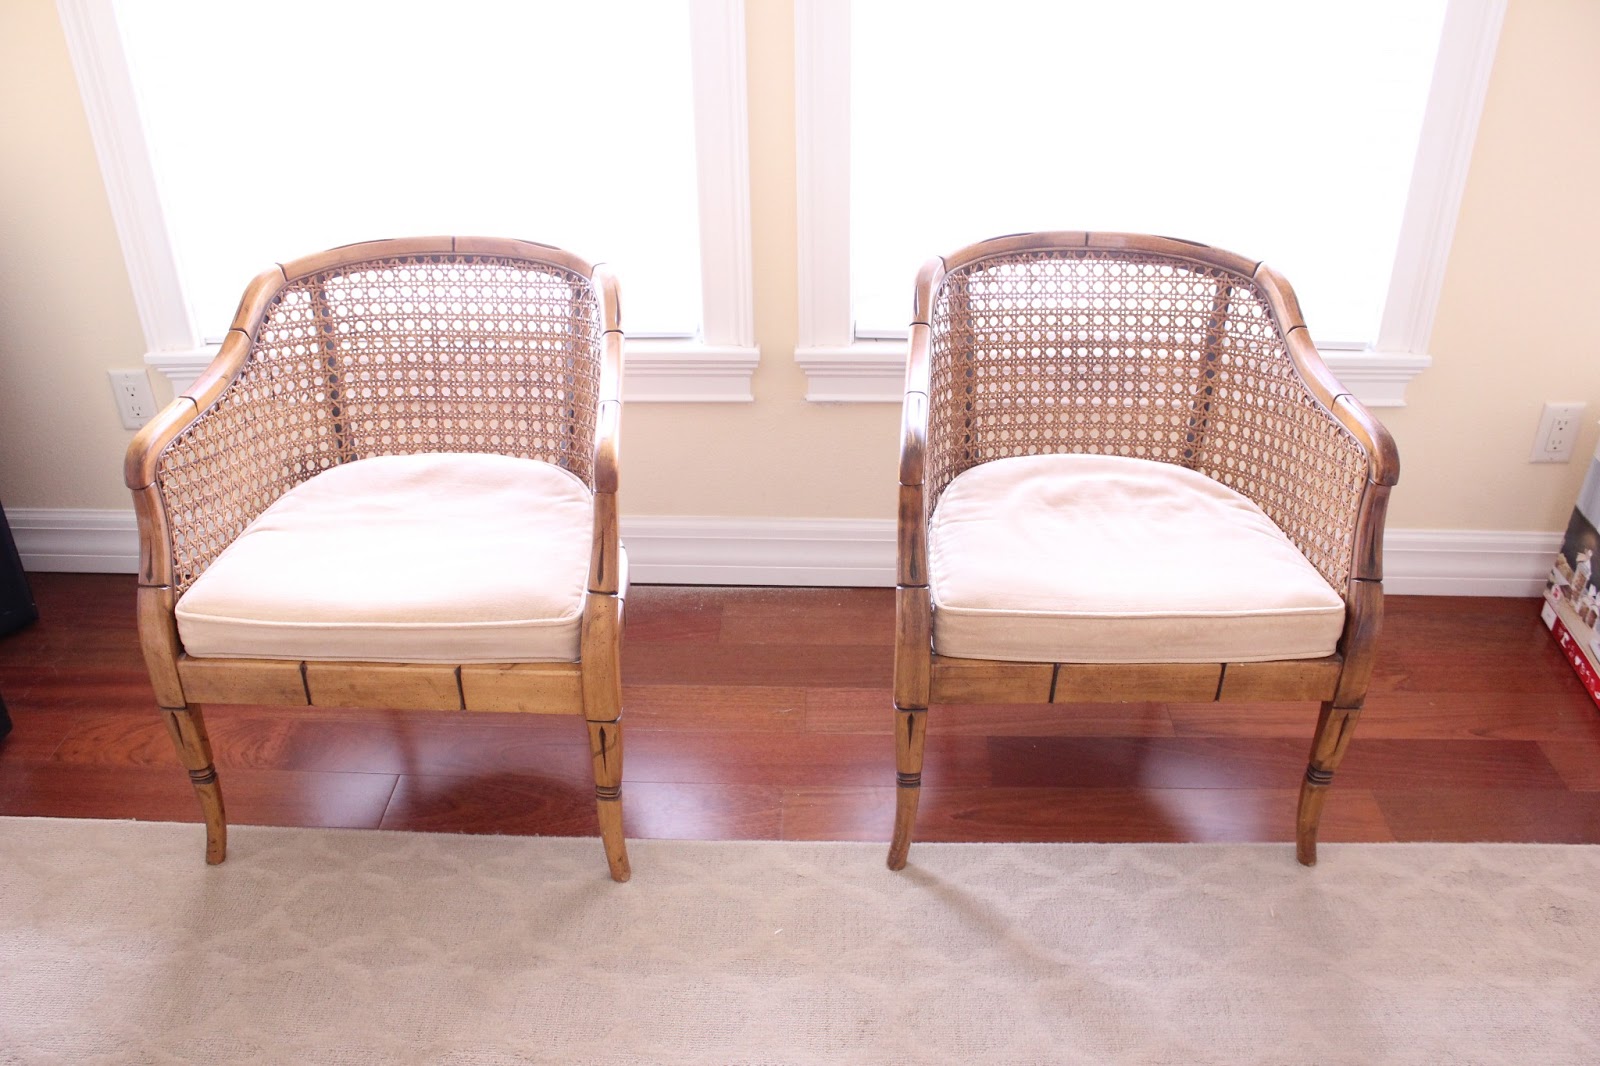
So these two lovely chairs were passed down to us...


They've got a ton of character, but obviously need a little TLC. But what exactly should we do with them? Paint them a neutral color and cover the cushions with some fun fabric? Or should we go with a daring paint color and keep a neutral cushion? Decisions, decisions!


I mean check out the details on these chairs. We really want to make these chairs shine, and would appreciate any input! So, what would you do with these twin chairs?

xoxo

Monday, April 22, 2013

Wow - Slacking!

Well hello there! It's been far too long since my last post. Lots has happened in the last few months. Our sweet boy is now 7 months old! Can you believe it? He is such a blessing to our family and I love him more and more everyday.


I promised {months ago} to post photos of the console table we made for our living room. So to honor that promise, here it is...


It's nothing fancy, but we love it. It brightened up the room so much making it much more inviting. We just need to do something with those pesky wires so they're less visible. I'll leave that job to the hubs.

Well, until next time, friends. I {promise} not to shy away for so long this time.

Wednesday, January 2, 2013

Long Weekend; New Project

It's been so nice having the hubby off work for the last 4 days. I've not only been able to enjoy his company, but also his handy carpentry skills. I take full advantage of his handyman skills as often as I can!

This weekend we {as in mostly hubby} have been hard at work on our latest project: a new console table for our living room. The table requires few tools {thank goodness!} and a few hours of hard work.

My boys are ready to tackle the project!

Lots of unfinished wood

The hubby loves his Kreg Tool

The table is coming together quickly. Next steps: sanding and painting, and it'll be done! We chose Chenille Spread by BEHR for the paint color. It's a really pretty creamy neutral that'll match the room perfectly:

What do you think?

After we finish the table, we'll just have to decide where to put it. It's a toss up between placing it behind the couch or using it as a console table for the TV. I vote for the latter {I'll keep you posted on our decision}!

The table is nothing fancy, but I'm positive it's going to be a splendid addition to our living room.  I can't wait to see it completed. Stay tuned!

Sunday, December 30, 2012

From Drab to Vintage Chic

The huge front porch of our 1920's bungalow was in desperate need of some seating. But not just any would do; it needed to match not only the era of the house, but also my liking. After searching high and low, my mother-in-law found these old things {an equally ugly pair} at a garage sale:


I could not wait to get my hands on them to fix 'em up! The hubs and I made a quick trip to the hardware store to grab our supplies:

  • Rust-Oleum Clean Metal Primer
  • Rust-Oleum Hammered
  • Valspar Outdoor Color + Protection spray paint (Satin Spring Sprout)
  • 3M Paint & Rust Stripper
  • Shiny {stainless} bolts
And after a little elbow grease and TLC, voila, almost-new chairs...


The chairs also needed a little cushion, so we made some easy-to-sew lumbar pillows in a bright, springy fabric. 

I absolutely love how the chairs turned out! They're not only chic, but oh so comfy. The little Boo Boo loves to rock in them with mama too!